


Imagery of all sorts has become so important to design and geospatial projects that it’s almost ubiquitous. And most people are familiar with the Bing Map tools built into Civil 3D and Map 3D now. But we often have requirements for imagery that’s more dynamic or serves a different purpose, such as multi-band satellite imagery. So let’s look at how we can bring in this imagery into Civil 3D to use for our design or analysis.
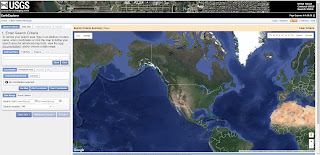
First we need to find our imagery. I’m going to hit the USGS Earth Explorer to download some High Resolution Orthoimagery. I won’t show how at this point – there’s a number of tutorials on the site. But you select the area and type of data you want, and it will generate a download package and link.
 The download package provides a ZIP archive with several stacked directories – depending on the specific data set. Navigate the directories to find the actual image files.
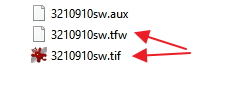
Specifically here, we’re looking for the TIF, which is the image, and the TFW, which is the world or correlation file. The world file tells AutoCAD where the image is in the world. We need both to effectively place the image in its correct geographic location.
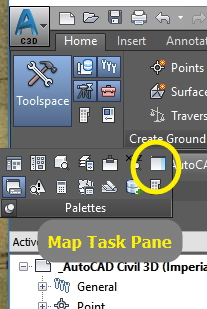
Now we’ll go into Civil 3D or Map 3D and load the image. We’ll need to have the Map Task Pane open. If it’s not we can open it by going to the Civil 3D Palettes ribbon and expanding it.
Once it’s open, go to the Data icon at the top right. Select Connect to data.

 Select the Add Raster Image and we’ll go find the image we just saved in the Source File or folder box – note you can use the folder to load several images at once. Be sure to select the image itself – the TIF. AutoCAD will recognize the world file automatically. We can add a name for the connection, and then hit connect. It will bring up a status box, and once it finishes creating a connection you can select the image and add it to you Map.
Note that it will read the project, and if your drawing has no coordinate system it will assign the one from the image. If there is one, it will generally re-project to fit the coordinate system where possible. At this point, you also have the option to combine multiple images (if you have them) into the screen.
Depending on the size, it may take a little while, but the image should come into your screen at the correct coordinate system and scale.
This method keeps your performance pretty good as it samples based on your current view scale. You can see the link to your image connection in the Map Task Pane and use the check mark to make it visible or invisible.

Good luck with your imagery!
No comments:
Post a Comment